How to Make a Faceless AI Reel From One Photo
A tested, step-by-step workflow for turning one photo into a faceless AI reel — covering visuals, script, voiceover, and editing, with an honest comparison of full-pipeline tools versus using a generator like Auto Seedance for the visual layer.

Umer Khan has spent the last two years building and testing AI-assisted content workflows for YouTube, from scripting to 2D animation. He writes about what actually works in AI video production including the parts that don't.
Quick answer: Upload one clear photo to an image-to-video AI tool, write a short script, generate voiceover, animate the photo into short video segments, then edit everything together with captions and music. The full process takes under 30 minutes once you know the order to do it in, and no camera, studio, or on-screen appearance is required at any step.
Faceless content stopped being a workaround for camera-shy creators a while ago. It's now the default format for entire accounts across finance, productivity, tech, and business niches — not because people are hiding, but because the workflow is faster, more private, and easier to scale than filming.
1. What Is a Faceless AI Reel?
A faceless AI reel is short-form video — built for Instagram Reels, TikTok, or YouTube Shorts — where AI generates the visuals and often the voice, without the creator appearing on camera. Starting from one photo specifically means the visual foundation is a single image, animated and extended into video segments, rather than filmed footage or a stock clip library.
Why Start From a Photo Instead of a Text Prompt?
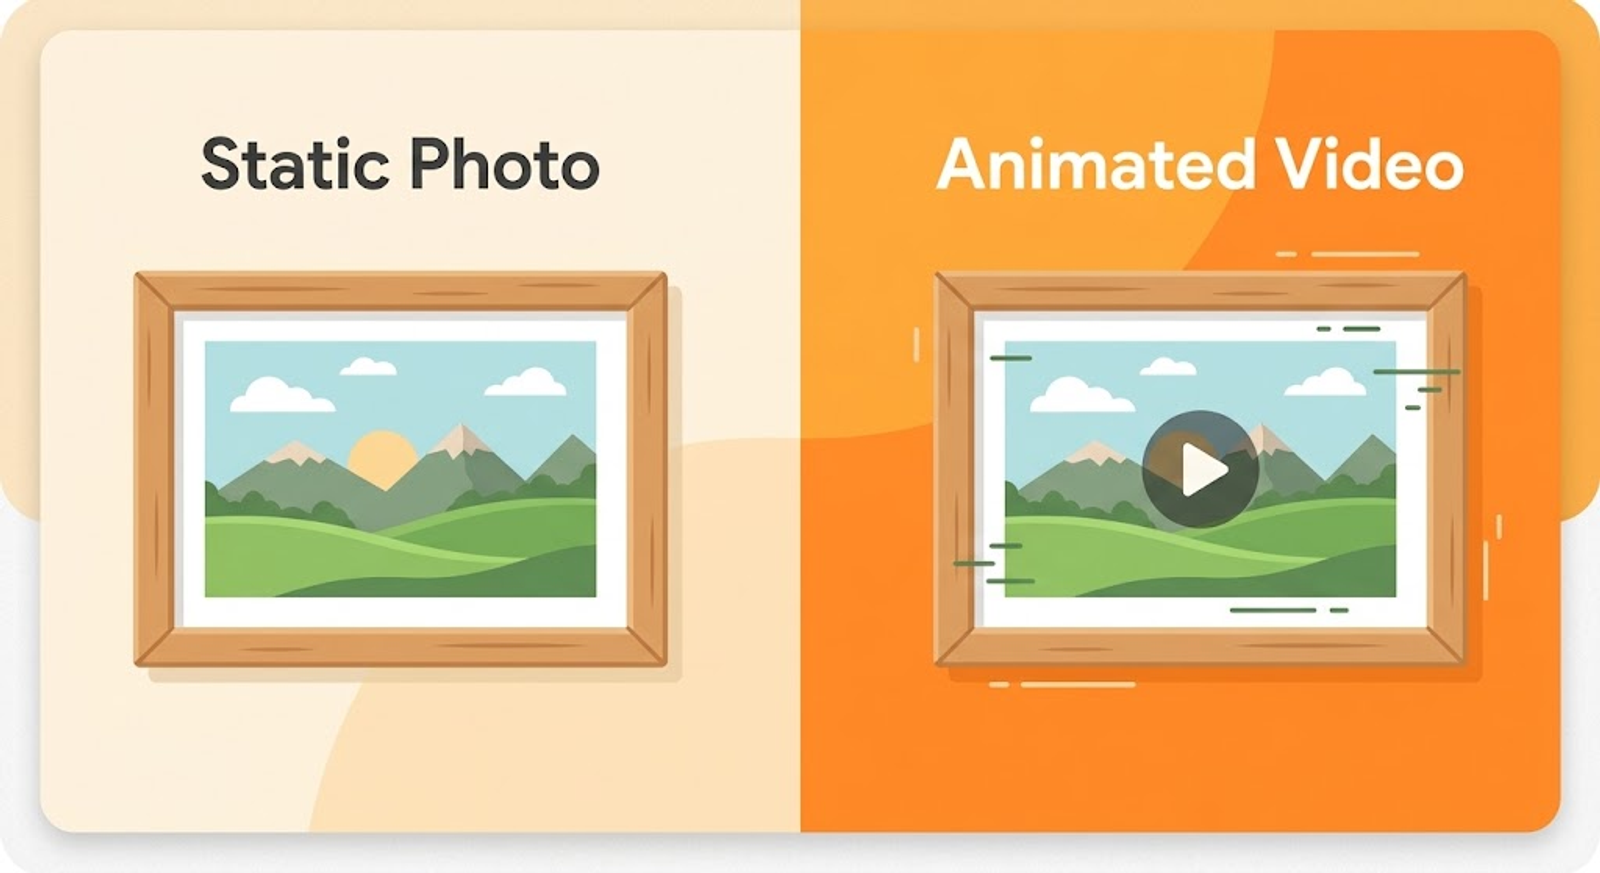
A photo gives you a fixed, specific starting point — your product, your face for an avatar-style reel, or a specific scene you already have. Text-to-video generates something new every time, which is faster for generic content but harder to keep visually consistent with a brand or a specific subject across multiple reels.
2. How Does the One-Photo Workflow Actually Work?
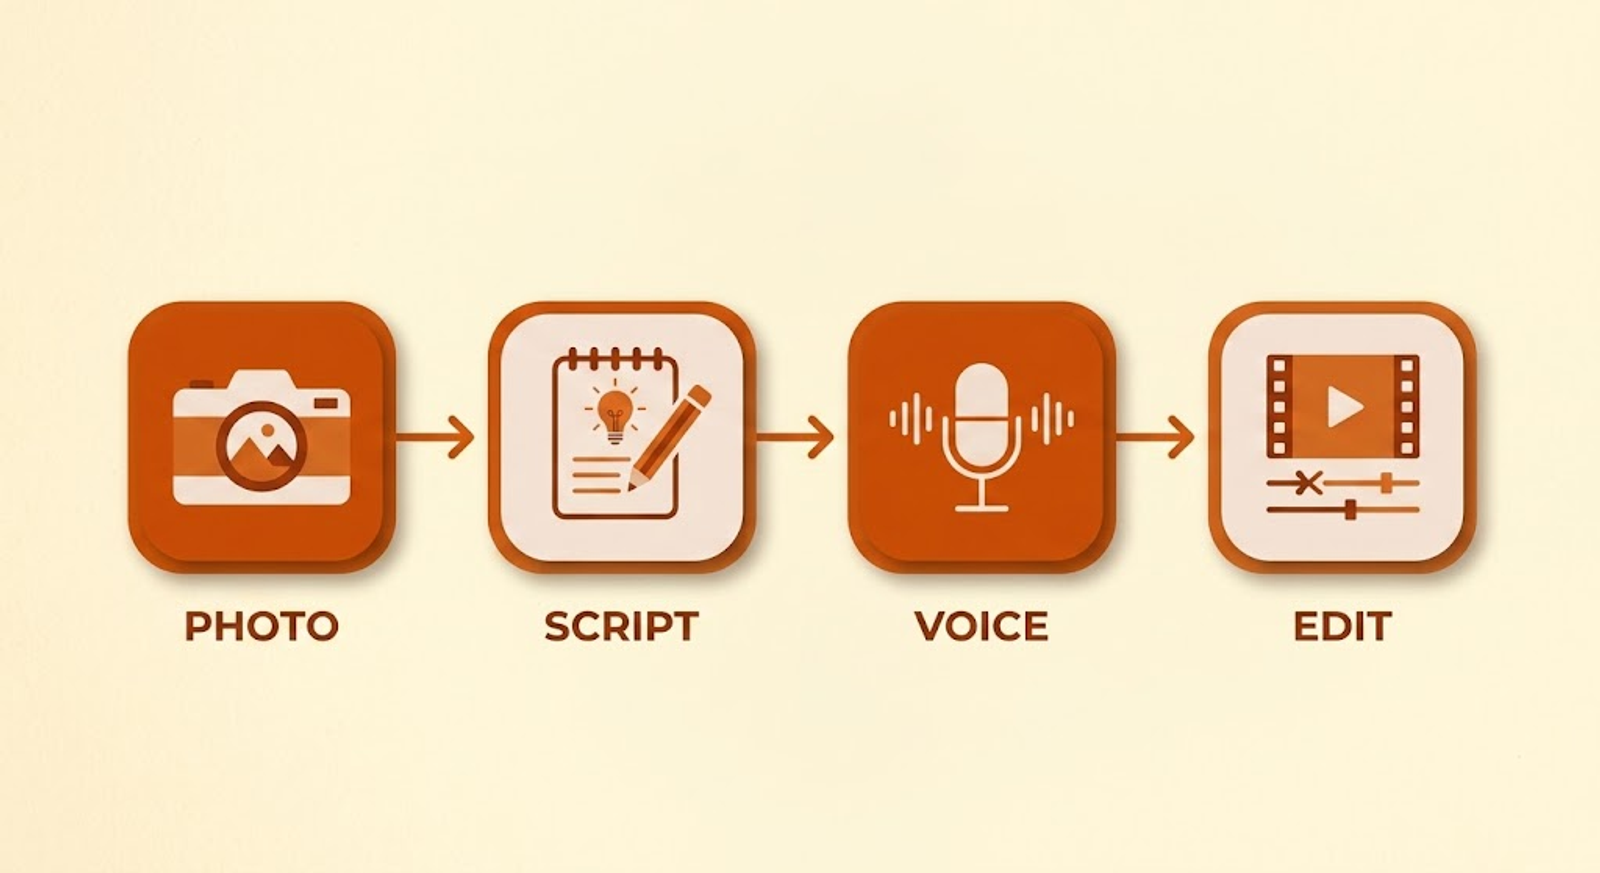
Four separate layers combine into one finished reel: the visual layer (animating the photo), the script, the voiceover, and the edit that stitches everything together with captions and pacing. Most tools in this space specialize in one or two of these layers rather than all four equally.
Image-to-video models specifically take a still photo and generate motion from it — camera movement, subject animation, or scene extension — based on a text description of what should happen. That's the core mechanic underneath every "photo to reel" workflow, regardless of which specific tool handles the rest.
3. Step-by-Step: Photo to Published Reel
Step 1: Pick and prepare your photo. Use a clear, well-lit image — a product shot, a scene, or a person if you're building an avatar-style reel. Higher resolution source photos produce cleaner animated output.
Step 2: Write a short script first, before generating anything. A 20-40 second reel script needs one hook, one core point, and one clear call to action — write this before touching any generation tool, not after.
Step 3: Generate voiceover from your script. Record your own voice for the most authentic result, or use an AI voice tool and edit the pacing afterward rather than publishing it raw.
Step 4: Animate the photo into video using an image-to-video generator. Describe the specific motion you want — a slow zoom, a camera pan, a subject animation — rather than a vague "make this move" prompt.
Step 5: Break the script into scene segments if the reel needs more than one visual. Match each segment of your script to a specific moment or angle so the visuals support the narration instead of just looping in the background.
Step 6: Edit everything together. Layer the voiceover, the generated video segments, captions, and music into one timeline, trimming for pacing rather than leaving dead air between points.
Step 7: Add captions and export in the right aspect ratio. Vertical 9:16 for Reels, TikTok, and Shorts — auto-captioning tools handle this step quickly if your editor supports it.
Step 8: Review before publishing. Check that the voiceover timing matches the visuals, and that no generated frame looks obviously distorted before it goes live.
4. Main Benefits of This Approach
- No filming equipment or studio setup needed — no lights, no camera, no reshoots for a stumbled line.
- Faster iteration — testing a new angle or hook takes minutes, not a full reshoot.
- Consistent output without camera fatigue — you can maintain a posting schedule without needing to "feel like filming" that day.
- Privacy — your face never has to appear on screen if you don't want it to.
- Scalable across niches — the same workflow applies to tutorials, product content, storytelling, or commentary.
5. Problems and Limitations to Expect
Engagement on faceless content is real, but it isn't automatic. Retention comes down to script pacing and voiceover clarity, not visual polish alone — a photorealistic animated scene with a flat, unbroken script still loses viewers.
Where Visual Consistency Breaks Down
If your reel uses more than one generated scene, keeping the subject or product looking identical across segments is a genuine limitation across nearly every image-to-video tool right now, covered in more depth in our guide on why AI character consistency is still broken. Plan for at least one regeneration per multi-scene reel rather than expecting a perfect first pass.
Raw AI Voiceover Is a Common Giveaway
Unedited AI voice output tends to sound flat across longer sentences, which is one of the fastest ways a faceless reel reads as low-effort. A short manual editing pass on pacing makes a bigger difference than switching to a more expensive voice tool.
6. Faceless Reel Tools Compared
7. Where Auto Seedance Actually Fits Into This Workflow
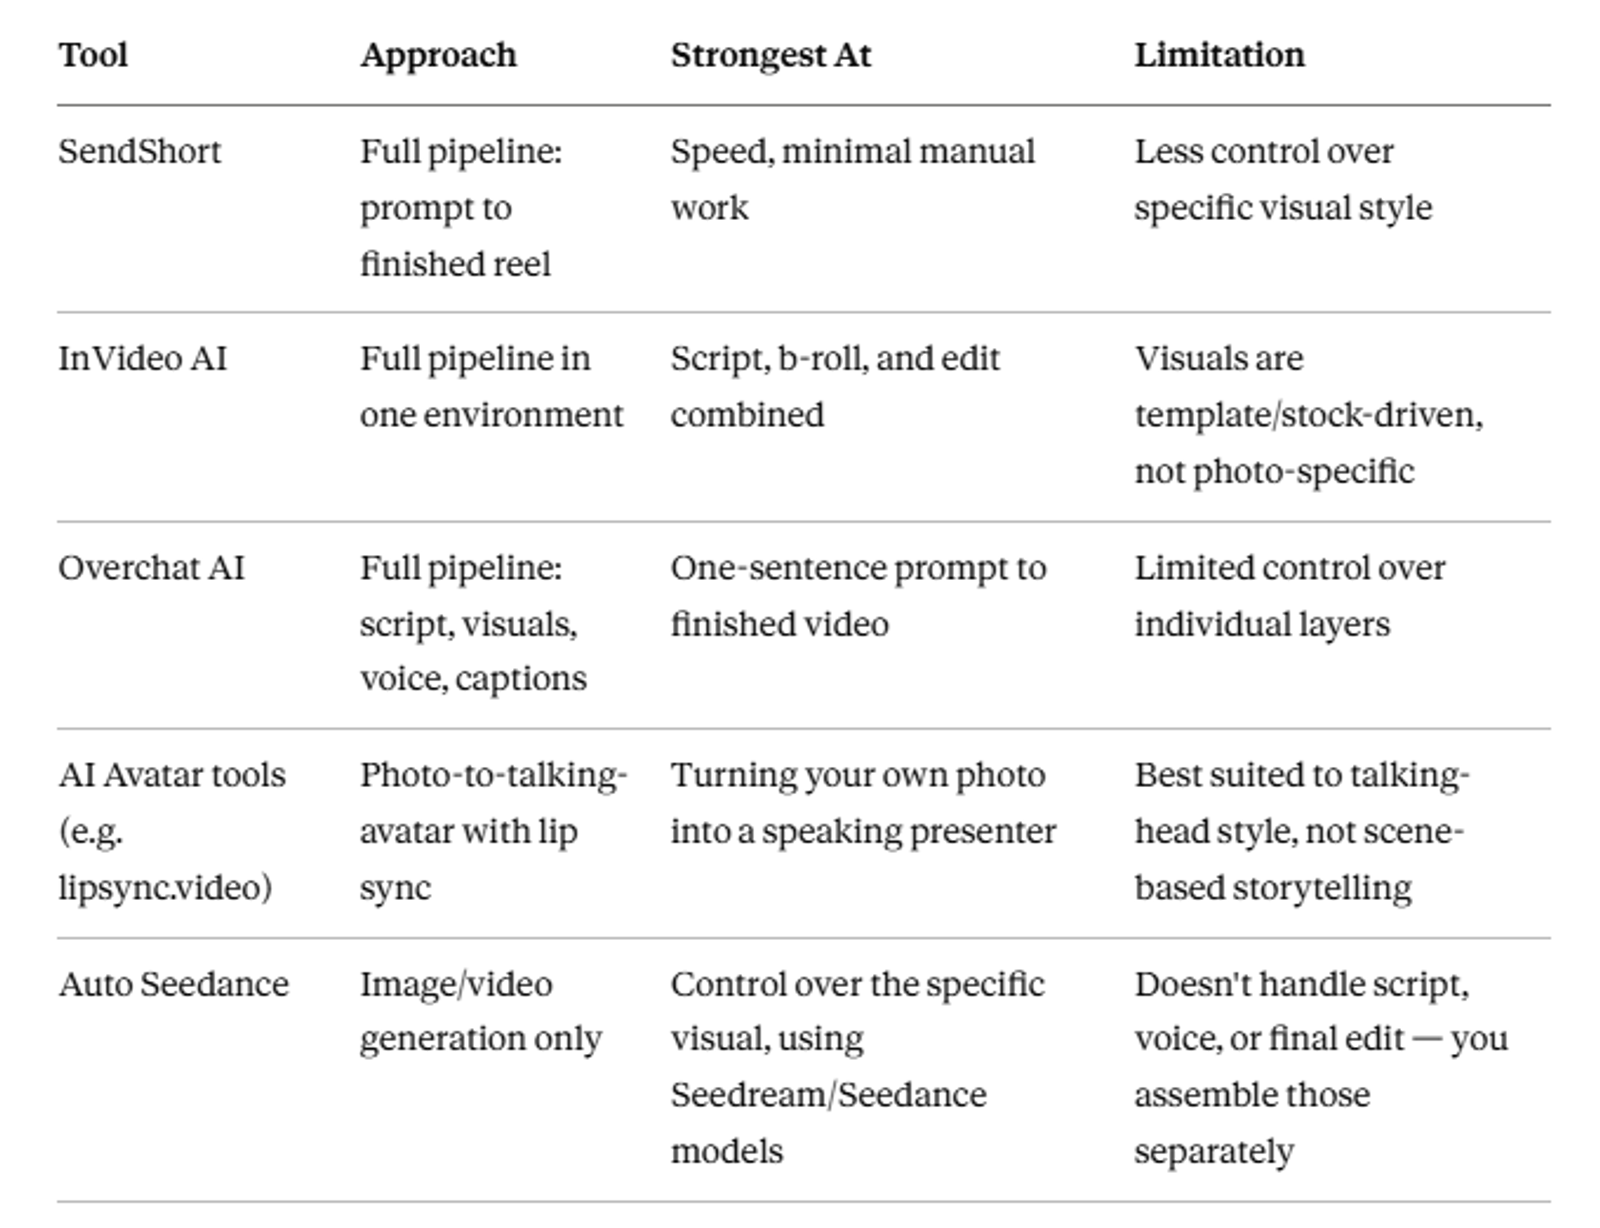
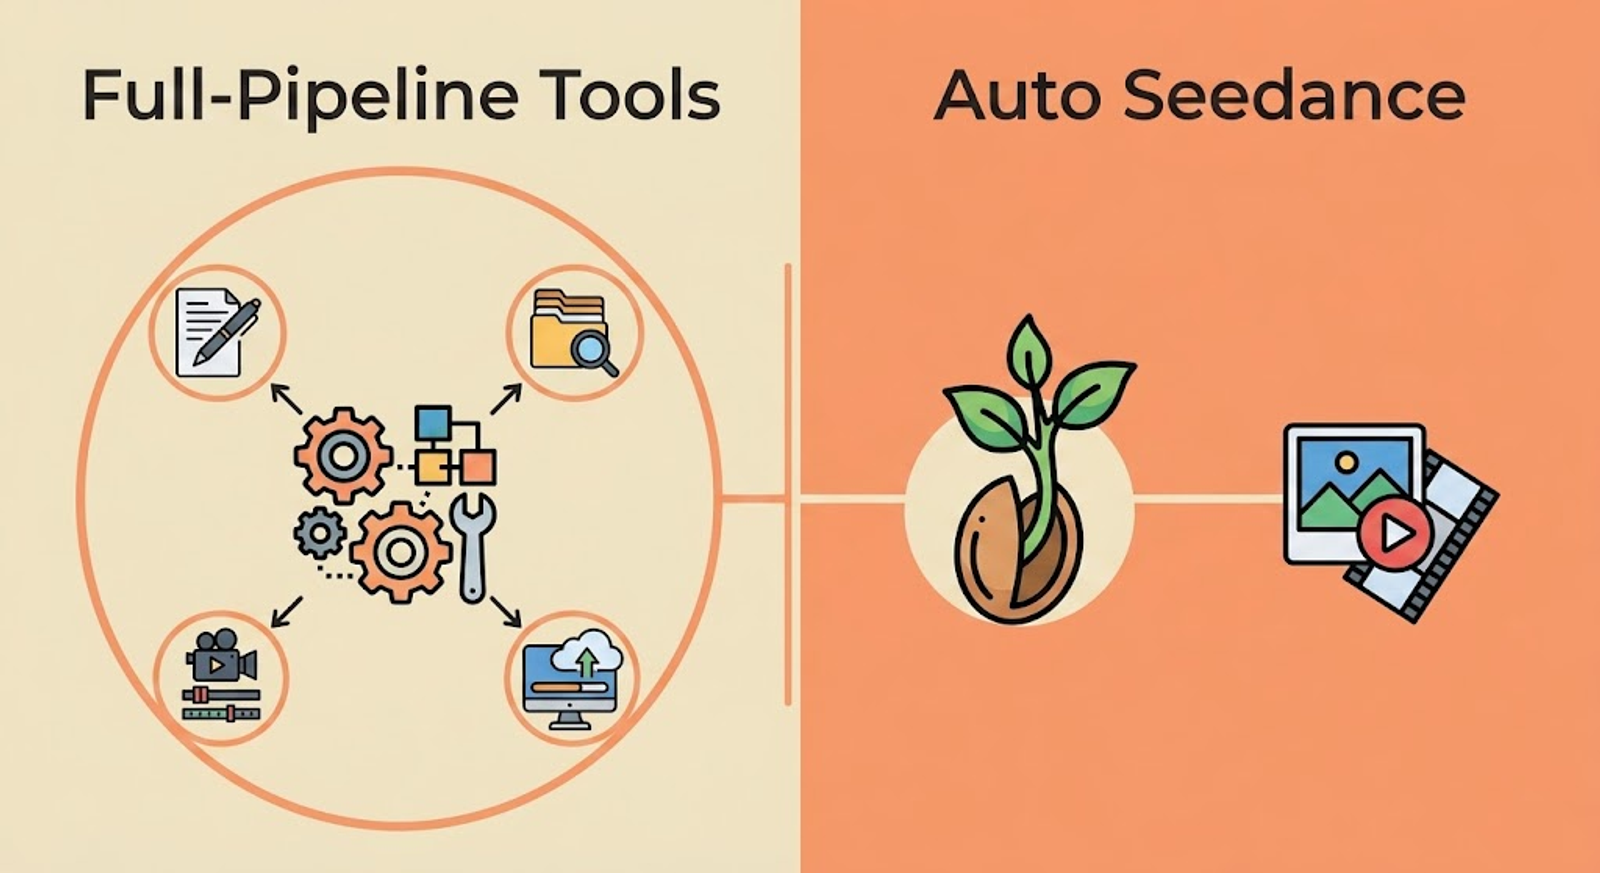
Full transparency, matching how we've described every tool comparison on this site: Auto Seedance is not a full faceless-reel pipeline the way SendShort or Overchat AI are. It handles Step 4 above — turning your photo into animated video — and nothing beyond that.
What That Means in Practice
If you want a one-prompt, fully automated reel with minimal manual work, a full-pipeline tool is the faster path, at the cost of less control over the specific visual outcome. If you have a specific photo, product, or scene you need animated precisely — not a generic template — using Auto Seedance for the visual layer and handling script, voice, and editing yourself gives you more control over exactly how that one photo becomes video.
Neither approach is objectively better. It depends on whether visual precision or end-to-end speed matters more for your specific reel, and that's a genuine tradeoff worth being honest about rather than glossing over.
8. Is This Actually Free?
Yes, a basic version of this workflow is free. Auto Seedance's free credits cover the image-to-video step, most editors have a free tier with watermark or export limits, and free AI voice tools cover the voiceover step at a basic quality level.
Where cost enters: higher output volume, removing watermarks, or wanting premium voice quality typically pushes toward a paid tier on at least one layer of the four-step stack.
9. Common Mistakes That Kill Engagement
- Publishing raw, unedited AI voiceover — flat pacing is one of the fastest ways to lose a viewer in the first three seconds.
- Skipping the script and improvising during generation — leads to rambling reels with no clear hook or CTA.
- Using a low-resolution or poorly lit source photo — the animated output inherits every flaw in the original image.
- Ignoring visual consistency across multi-scene reels — a subject that looks different scene to scene breaks viewer trust fast.
- Skipping captions — a large share of social video is watched muted, and uncaptioned reels lose that audience entirely.
10. Who Should Use This Approach
Good fit: solo creators and small teams wanting privacy and speed, product-based accounts needing consistent visual content from existing photos, anyone testing a content niche before investing in filming equipment.
Consider a full-pipeline tool instead if: you want zero manual assembly and are fine with more template-driven visuals — SendShort, InVideo AI, or Overchat AI trade visual precision for speed in a way that suits high-volume, generic content better than this photo-first approach.
Final Thoughts
None of the four layers here — visuals, script, voice, edit — are individually hard anymore. What still takes deliberate effort is the script, since that's the layer no AI tool fully replaces the judgment for.
Pick a workflow that matches what you're optimizing for: speed, or visual precision. Both are legitimate, and the tools above split cleanly along that line.
Sources
- Faceless reel workflow and tool feature claims cross-referenced against current published guides from SendShort, InVideo AI, and Overchat AI, current as of this writing
- Visual consistency limitations cross-referenced against our own prior testing, detailed in Why AI Character Consistency Is the Biggest Problem Nobody's Solved Yet
- Platform algorithm behavior regarding faceless content based on current publicly available creator guidance rather than platform-confirmed technical documentation
Frequently Asked Questions
Do I need any editing skill to make a faceless AI reel?+
Basic familiarity with a video editor helps, but most tools in this space (CapCut, InVideo AI, and similar) are built for minimal editing experience.
Can I use a photo of a product instead of a person?+
Yes — the same image-to-video workflow applies to product photos, scenes, or any single image you want animated into video.
How long does the full process take?+
Under 30 minutes once you know the step order, including script writing, generation, and a basic edit pass.
What's the biggest reason faceless reels underperform?+
Weak scripting and unedited voiceover pacing come up far more often than visual quality as the reason a reel loses viewers early.
Will AI voiceover sound robotic?+
Raw output from most tools does sound slightly flat in longer sentences. A short manual pacing edit before publishing fixes most of that.
Does Auto Seedance make a complete faceless reel by itself?+
No — it handles the image-to-video visual layer specifically. Script, voiceover, and final editing are separate steps you handle with other tools.
Is faceless content treated differently by platform algorithms?+
Available evidence suggests algorithms weight watch time and retention, not whether a creator's face appears on screen.
Keep reading
Suggested Related Articles

GPT-6 Sol vs Luna: What OpenAI's Pricing Table Actually Means
GPT-6 Sol and Luna launched September 2026 with a pricing table that confused much of Reddit on day one. Here's the real cost breakdown, the naming trap versus GPT-5.6, and which model actually fits your work.

How to Automate Product Video From Your Ecommerce Catalog With AI
AI product video automation actually works two different ways — generative AI and template-based pipelines. Here's the full workflow, which tools fit which job, and what goes wrong once you scale past a handful of products.
10 Best AI Video Generators for Faceless YouTube Channels in 2026 (Real Costs, Real Workflows)
We compared 10 AI video generators for faceless YouTube channels in 2026 — real creator-reported costs, an honest look at one-click vs. manual workflows, and which tool actually fits your format and budget, not just the highest-rated demo reel.
How to Use ChatGPT Images 2.5 for AI Photo Editing
The prompt structure that makes ChatGPT Images 2.5 editing work, plus Sketch, comments, templates, Flare vs Sunburst, pricing, and the real limits.